Easy Homemade Apple Pie Filling Recipe
Did you know Americans eat about 186 million fruit-based desserts each year? This shows how much we love traditional sweets. You can make this tasty mix at home and impress your family and friends.
This mix is great for turnovers, pastries, or cinnamon-topped squares. You can make it ahead of time to save energy during the holidays. It stays fresh in the freezer, so you can enjoy it anytime.
With these easy steps, you can turn any day into a special occasion. Making your own mix means you always have the best components for your next baking project. It’s a game-changer for anyone who loves seasonal flavors.
Table of Contents
Why You Should Make Your Own Apple Pie Filling
Making apple pie filling at home is surprisingly simple. It offers many benefits. You get a product that fits your taste and dietary needs perfectly.
Complete Control Over Ingredients and Sweetness Levels
When you make your own apple pie filling, you have complete control over the ingredients. You can pick the apples you like and adjust the sweetness. You also avoid additives and preservatives found in store-bought products.
This is great for those with dietary restrictions. It helps if you want to reduce sugar or use certain sweeteners.
Significant Cost Savings Compared to Store-Bought Options
Preparing your own apple pie filling can save you a lot of money. Buying apples in bulk and using pantry ingredients can cut costs.
Also, making a big batch at once is cheaper than buying many store-bought containers.
Unmatched Fresh Flavor and Perfect Texture
Homemade apple pie filling has an unmatched fresh flavor and texture. Cooking the apples just right keeps their texture and taste.
This makes your pie delicious and balanced. It has just the right sweetness and tartness.
Essential Ingredients for Homemade Apple Pie Filling
Making the perfect homemade apple pie filling starts with picking the right ingredients. The quality and type of these ingredients greatly affect the taste, texture, and look of the filling.
Best Apple Varieties for Pie Filling
Choosing the right apples is key for a delicious pie filling. You need a mix of sweet and tart apples for the best flavor. Granny Smith apples are great for their tartness, while Gala or Fuji apples add sweetness.
Using a mix of apple types is best. For example, mixing 2/3 tart apples with 1/3 sweet apples creates a balanced taste.

Sweeteners: White Sugar, Brown Sugar, and Alternatives
The sweetener you choose can change the filling’s taste and texture. White sugar is traditional and adds a clean sweetness. Brown sugar, with its molasses, gives a richer flavor.
Other sweeteners like honey and maple syrup can add unique tastes. But, they are stronger and can make the filling more moist.
Spices That Enhance Apple Flavor
Spices are important for boosting the apple filling’s flavor. Cinnamon is the most common spice, adding warmth and depth. Nutmeg and allspice also add a sweet and aromatic taste.
A little salt can also improve the flavor. It balances the sweetness and brings out the apples’ natural taste.
Cornstarch vs. Tapioca: Choosing Your Thickener
Choosing between cornstarch and tapioca depends on the texture you want and any dietary needs. Cornstarch is a common thickener that works well with sugar and apples.
Tapioca starch, from cassava root, is gluten-free and makes a clearer filling. It’s good for those with gluten intolerance or sensitivity.
| Thickener | Characteristics | Best Use |
|---|---|---|
| Cornstarch | Common, effective thickener; can make filling cloudy | Traditional apple pie filling |
| Tapioca Starch | Gluten-free; provides clear filling | Gluten-free or clear filling recipes |
Kitchen Tools and Equipment You’ll Need
Before you start making your apple pie filling, make sure you have the right kitchen tools. The right equipment makes the process smoother. It also helps your delicious apple pie filling recipe turn out perfectly.
Essential Pots, Pans, and Bowls
A large pot is key for cooking the apple pie filling. It should be big enough for all the apples and liquid. A heavy-bottomed pot or Dutch oven is best because they heat evenly. You’ll also need a large bowl for mixing the apple slices with sugar and spices.
Here’s a list of the pots, pans, and bowls you’ll need:
| Item | Description |
|---|---|
| Large Pot | For cooking the apple pie filling |
| Dutch Oven | Optional, for even heat distribution |
| Large Mixing Bowl | For combining apple slices with sugar and spices |
Knives, Peelers, and Slicing Tools
To prepare the apples, you’ll need a good knife for peeling and coring. A peeler helps remove the apple skins easily. A sharp slicing knife or mandoline is needed for uniform slices. The right tools make a big difference in your easy apple pie filling recipe.
Some essential tools include:
- A paring knife or a sharp chef’s knife
- A vegetable peeler
- A mandoline or a sharp slicing knife
Measuring Cups and Spoons
Accurate measurements are key for the perfect balance of sweetness and flavor. Use measuring cups for dry ingredients like sugar and flour. Measuring spoons are best for spices and extracts.

With these essential kitchen tools and equipment, you’ll be ready to make a delicious apple pie filling recipe. It’s sure to impress.
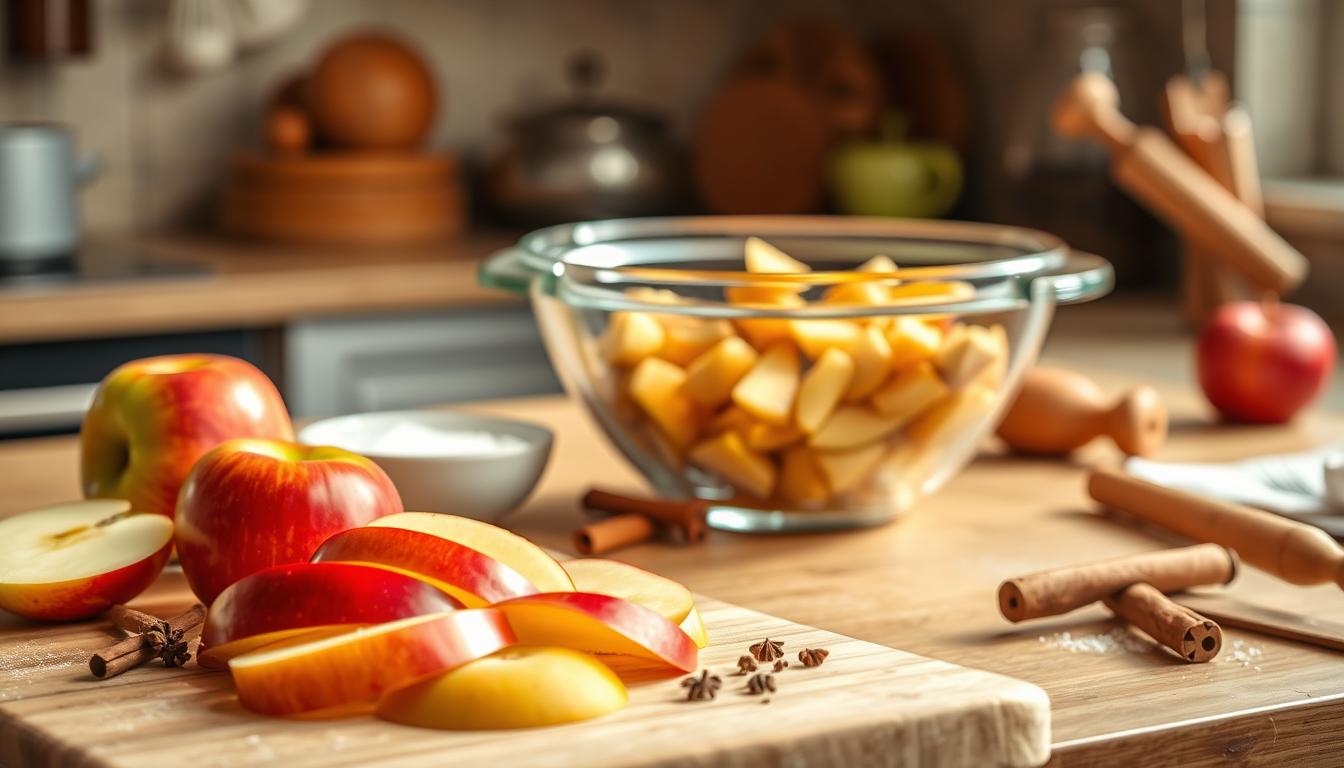
Selecting and Preparing Your Apples
The secret to a tasty apple pie filling is choosing the right apples and preparing them well. The apples you pick will greatly affect the taste, texture, and quality of your pie filling.
How to Choose Firm, Flavorful Apples
Not all apples are good for pie filling. You need apples that are firm, flavorful, and hold their shape when cooked. Granny Smith, Fuji, and Golden Delicious are top choices. They have a firm texture and a rich flavor.
When picking apples, look for ones that are firm and have no bruises or soft spots. Stay away from apples that are too soft or mealy. They won’t do well when cooked.

Washing, Peeling, and Coring Techniques
After picking your apples, it’s time to get them ready for cooking. Start by washing them well to remove dirt or wax. Then, peel the apples using a vegetable peeler or a paring knife. This will make your pie filling smooth and even.
Next, core the apples to remove seeds and tough fibers. You can use an apple corer or a paring knife. Make sure to remove any bruised or damaged areas too.
Achieving Uniform Apple Slices for Even Cooking
To ensure your apple pie filling cooks evenly, slice the apples the same size. Use a sharp knife or a mandoline for thin, consistent slices. This way, all the apples will cook at the same rate, preventing some from getting too soft.
| Apple Variety | Texture | Flavor Profile |
|---|---|---|
| Granny Smith | Firm | Tart, Green Apple |
| Fuji | Crispy | Sweet, Mild |
| Golden Delicious | Tender | Mild, Sweet |
Preventing Browning Before Cooking
Preventing browning is a common challenge when preparing apples for pie filling. To avoid this, soak the sliced apples in water and lemon juice or vinegar. The acidity will slow down browning, keeping your apples looking fresh.
Or, you can use an anti-browning product or cook the apples right after slicing. These steps will help your apple pie filling look and taste great.
Step-by-Step Apple Pie Filling Recipe
Making your own apple pie filling is simpler than you might think. This guide helps you control the ingredients and sweetness. This ensures a perfect filling for your pies.
Step 1: Gather and Measure All Ingredients
First, collect all the ingredients you need. This includes your favorite apples, sugar, spices, and thickener. Make sure to measure each ingredient accurately for the best results.
Step 2: Combine Sugar, Spices, and Thickener
In a bowl, mix the sugar, spices (like cinnamon and nutmeg), and thickener (cornstarch or tapioca). This dry mix will add flavor and the right consistency to the apples.
Step 3: Create the Liquid Base with Water and Lemon Juice
In a large saucepan, mix water and lemon juice. The lemon juice prevents the apples from browning and adds a bit of tartness.
Step 4: Add Apples and Bring to a Simmer
Add sliced apples to the saucepan and sprinkle the dry sugar mixture over them. Toss to coat the apples well. Then, bring the mixture to a simmer over medium heat.
Step 5: Cook Until Apples Are Tender
Keep cooking the apple mixture, stirring now and then, until the apples are tender. This should take about 20-25 minutes, depending on the apple type and slice thickness.
Step 6: Cool the Filling to Room Temperature
After cooking, remove the saucepan from the heat. Let the apple pie filling cool to room temperature. This step is important to prevent bacteria growth and prepare the filling for use or storage.
Here’s a quick summary of the cooking times and temperatures for the apple pie filling:
| Step | Cooking Time | Heat Level |
|---|---|---|
| Simmering Apples | 20-25 minutes | Medium |
| Cooling Filling | Until room temperature | Off |
Expert Tips for Perfect Apple Pie Filling Every Time
Want to make amazing apple pie filling? Follow these expert tips to elevate your baking. Making the delicious apple pie filling recipe is all about detail and secrets.
Avoiding Mushy or Undercooked Apples
Choosing the right apple variety is key to avoiding mushiness. Mix firmer apples like Granny Smith with sweeter ones like Gala. This mix ensures a perfect texture and flavor.
Balancing Sweetness and Tartness
Getting the sweetness and tartness right is crucial. Adjust the sugar based on the apples’ natural sweetness. A splash of lemon juice can enhance the tartness and flavors.
Fixing Runny Filling or Overly Thick Consistency
The filling’s consistency is important. Add cornstarch or tapioca flour to thicken a runny filling. For a too-thick filling, a bit of water or apple juice can help.
| Thickening Agent | Amount to Use | Effect |
|---|---|---|
| Cornstarch | 1-2 tablespoons | Thickens filling without affecting flavor |
| Tapioca Flour | 1-2 tablespoons | Provides a clear, glossy finish |
Enhancing Flavor with Butter and Vanilla
Butter and vanilla extract can greatly improve the filling’s flavor. The butter adds richness, while vanilla adds a creamy note.
Preparing Filling in Advance Without Quality Loss
You can make your filling ahead of time without losing quality. Store it in an airtight container in the fridge for up to 2 days or freeze it. Let it come to room temperature before using it in your pie.
By using these expert tips, you’ll make a quick apple pie filling that’s always perfect. Whether for a traditional pie or new recipes, your homemade apple pie filling will impress everyone.
How to Store and Preserve Your Apple Pie Filling
Keeping your apple pie filling fresh is key. You can store it in the fridge, freezer, or use a water bath canner. Each method has its own benefits and rules to keep your filling fresh.
Refrigeration: Best Practices and Duration
Refrigeration is good for short-term storage. Use airtight containers to keep it fresh and prevent odors. Your filling can stay good in the fridge for up to 5 days.
Freezing in Portions for Future Use
Freezing is great for longer storage. Divide your filling into portions to thaw only what you need. Label the containers with the date and contents. Frozen filling can last up to 12 months.
Water Bath Canning for Shelf-Stable Storage
Water bath canning is perfect for long-term storage. It lets you keep your filling at room temperature. Just make sure to follow safe canning practices. Your filling can last up to 12 months in a cool, dark place.
Thawing and Reheating Instructions
Ready to use your filling? Here’s what to do: For chilled or frozen filling, let it come to room temperature or reheat it gently. For canned filling, just open the jar and use it.
| Storage Method | Duration | Benefits |
|---|---|---|
| Refrigeration | Up to 5 days | Easy to access, maintains freshness |
| Freezing | Up to 12 months | Long-term storage, convenient portioning |
| Water Bath Canning | Up to 12 months | Shelf-stable, long-term preservation |
Creative Ways to Use Your Homemade Apple Pie Filling
Now that you’ve made your delicious homemade apple pie filling, it’s time to explore the many creative ways you can use it. With a batch of apple pie filling from scratch, the possibilities for desserts and breakfast treats are vast and exciting.
Traditional Double-Crust and Lattice Pies
The classic use for apple pie filling is, of course, in a traditional double-crust or lattice-top pie. To make a beautiful lattice-top pie, roll out your pie dough to the desired thickness. Then, use a pastry cutter or a knife to create strips for the lattice.
Weave the strips into a lattice pattern over your filling, and trim the edges to fit. Crimp the edges to seal the pie and cut a few slits in the top to allow steam to escape during baking.
For a double-crust pie, simply roll out another piece of pie dough to fit the top of your pie, place it over the filling, and crimp the edges to seal. You can also use this filling in a galette or a rustic pie, where the crust is folded over the filling in a free-form manner.
Apple Turnovers, Empanadas, and Hand Pies
Apple pie filling is perfect for making individual-sized treats like turnovers, empanadas, and hand pies. Simply place a spoonful of the filling onto one half of a piece of pie dough, brush the edges with a little water, and fold the dough over to seal. Use a fork to crimp the edges and cut a few slits in the top to allow steam to escape.
- Turnovers: Use a square piece of dough and fold it in half to form a triangle.
- Empanadas: Use a round piece of dough and fold it in half to form a half-moon shape.
- Hand Pies: Use a round piece of dough and fold it over the filling to form a half-circle or a square shape.
Breakfast Options: Pancakes, Waffles, and Oatmeal
Apple pie filling makes a delicious topping for breakfast items like pancakes, waffles, and oatmeal. Simply warm the filling in a saucepan or in the microwave until it’s heated through, then spoon it over your breakfast treat. You can also mix some of the filling into your pancake or waffle batter for an extra-flavorful breakfast.
Try using apple pie filling as a topping for:
- Buttermilk pancakes
- Crunchy waffles
- Steel-cut oatmeal
Quick Desserts: Crisps, Cobblers, and Ice Cream Topping
Apple pie filling is also great for making quick and easy desserts like crisps, cobblers, and ice cream toppings. For a crisp or crumble, mix the filling with some sugar and flour, then top with an oat mixture and bake until golden brown. For a cobbler, mix the filling with some sugar and flour, then top with a biscuit or cobbler topping and bake until the fruit is tender and the topping is golden brown.
You can also use apple pie filling as a topping for ice cream, yogurt, or frozen yogurt. Simply warm the filling in a saucepan or in the microwave until it’s heated through, then spoon it over your ice cream or yogurt.
Conclusion
Now you know how to make tasty homemade apple pie filling. This easy recipe is perfect for anyone who loves baking. It’s a game-changer.
By making your own filling, you control the ingredients and sweetness. This ensures a perfect flavor every time. You can store it in the fridge or freezer for later use.
With your homemade filling, you can make many delicious desserts. Try it in pies, turnovers, crisps, cobblers, or even breakfast treats like pancakes and oatmeal. Try this recipe today and enjoy having homemade filling ready whenever you need it.