The Ultimate Turkey Brine Recipe for Juicy Meat
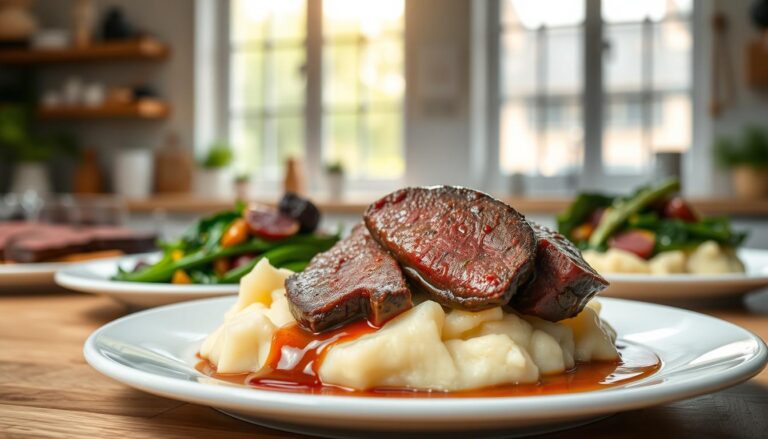
Imagine sitting down at the holiday table, surrounded by family and the warm scent of autumn. You carve into the main dish, only to find it dry and flavorless.
It’s a heart-breaking moment for any home cook who poured hours into a meal. You deserve a holiday where every bite is tender and worth celebrating.
Table of Contents
Using a solid turkey brine recipe ensures your bird stays dripping with moisture and deep flavor. This simple method transforms a stressful kitchen project into a guaranteed success.
Why Brining Your Turkey Makes All the Difference
Brining your turkey is key to a juicy and flavorful bird. It’s more than just a step before cooking. It’s a technique that makes your turkey taste amazing. By learning about brining, you can make sure your turkey is moist and full of flavor for your holiday feast.
The Science Behind Brining
Brining changes the turkey’s meat, making it hold more moisture. It involves soaking the turkey in a mix of water, salt, and spices. This tenderizes the meat and adds to its flavor.

Benefits You’ll Taste in Every Bite
Brining makes every bite of turkey better. It keeps the turkey juicy and adds to its texture and taste. The salt in the brine boosts the meat’s natural flavors, while spices and aromatics add depth. This results in a turkey that’s not just moist but also full of flavor.
| Characteristics | Brined Turkey | Non-Brined Turkey |
|---|---|---|
| Moisture Content | Higher | Lower |
| Flavor Profile | More complex and enhanced | Less complex |
| Texture | Tender and juicy | Drier and potentially tougher |
Understanding brining’s science and benefits can elevate your holiday meal. With a homemade turkey brine, you’re not just cooking a turkey. You’re creating a memorable culinary experience.
Essential Turkey Brine Ingredients and Their Roles
To brine a turkey well, knowing the key ingredients is key. A balanced brine is vital for a juicy turkey.
Salt: The Foundation of Any Brine
Salt is the heart of any brine. It tenderizes the turkey and boosts its flavor. It helps the meat hold more moisture while cooking.
Sugar for Balance and Browning
Sugar adds sweetness to the brine’s savory flavors. It also helps the turkey’s skin brown nicely, making it look great.
Aromatics and Spices That Enhance Flavor
Aromatics like onions and spices like peppercorns add depth to the turkey’s flavor. You can pick your favorites to make it your own.
Choosing Your Liquid Base
Choose between water or a flavorful liquid like stock or juice for your brine. The liquid base greatly affects the turkey’s taste, from simple to complex.

Here’s a quick look at the main turkey brine ingredients and their roles:
| Ingredient | Role |
|---|---|
| Salt | Tenderizes the turkey and enhances flavor |
| Sugar | Balances flavors and promotes browning |
| Aromatics and Spices | Adds depth and complexity to the flavor |
| Liquid Base | Provides the foundation for the brine, impacting the final flavor |
The Best Turkey Brine Recipe
Discover the secret to a succulent turkey with our top-rated brine recipe. This guide will show you the ingredients, equipment, and steps to create a mouth-watering turkey. It will be the centerpiece of your holiday feast.
Complete Ingredients List
To make the best turkey brine recipe, you’ll need the following ingredients:
- 1 cup kosher salt
- 1/2 cup brown sugar
- 1 gallon water
- 2 tbsp Worcestershire sauce
- 2 tbsp black peppercorns
- 2 tbsp coriander seeds
- 4 cloves garlic, minced
- 2 sprigs fresh thyme
- 2 sprigs fresh rosemary
These ingredients create a balanced brine that enhances the turkey’s natural flavors.
Equipment You’ll Need
To prepare and store the brine, you’ll need:
- A large pot for boiling the brine
- A food-grade container or brining bag large enough to hold the turkey
- A refrigerator or a cooler with ice packs to keep the brine cold
Ensuring that your equipment is clean and sanitized is crucial for food safety.
Step-by-Step Brine Preparation
Follow these steps to prepare your turkey brine:
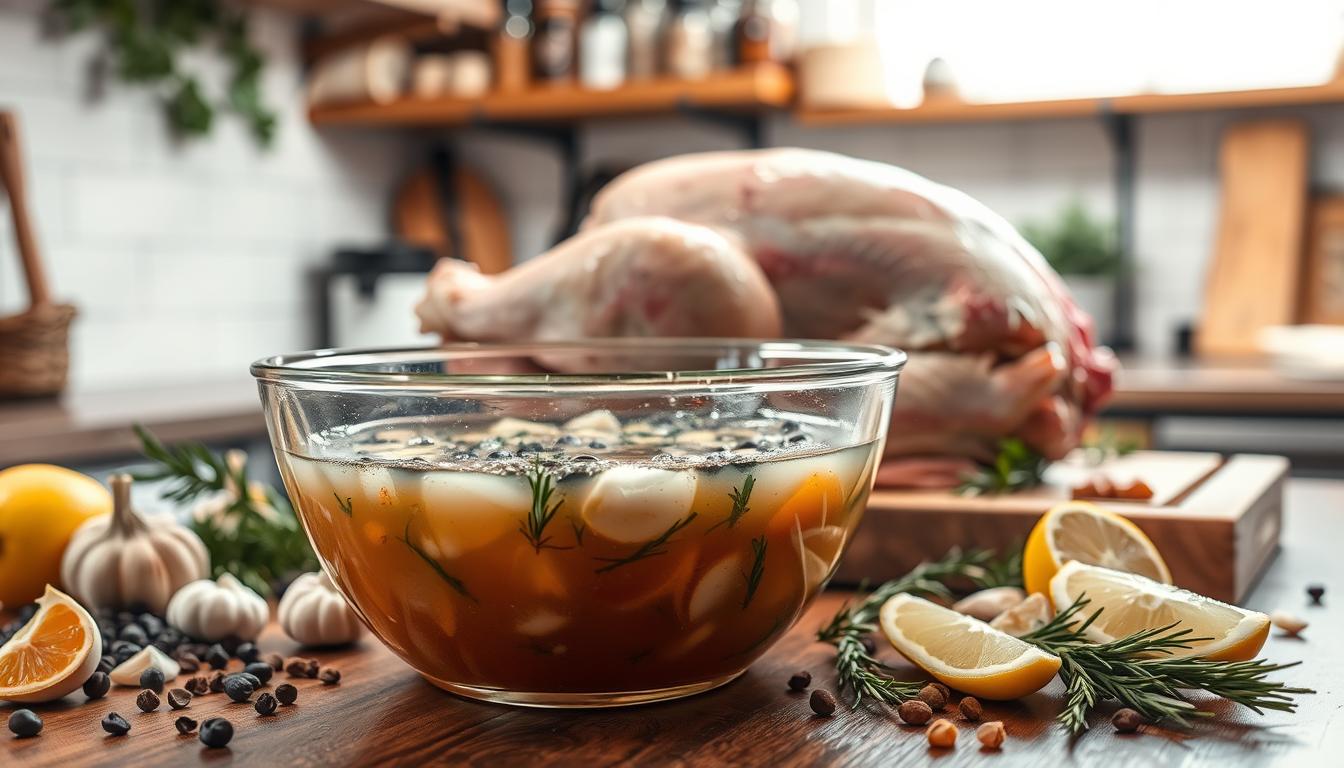
- Combine the Ingredients: In a large pot, combine the kosher salt, brown sugar, and 1 quart of water. Heat the mixture over medium heat, stirring until the salt and sugar are dissolved.
- Add Aromatics: Add the Worcestershire sauce, black peppercorns, coriander seeds, garlic, thyme, and rosemary to the pot. Bring the mixture to a boil, then remove from heat.
- Cool the Brine: Allow the brine to cool to room temperature. This step is crucial to prevent bacterial growth.
- Mix with Remaining Water: Once cooled, mix the brine mixture with the remaining 3 quarts of water in your prepared container or brining bag.

Your brine is now ready to use. Make sure to submerge the turkey completely and refrigerate at a safe temperature.
How to Brine a Turkey: Step-by-Step Instructions
Follow these steps to brine your turkey like a pro. Brining makes your turkey juicy and flavorful. It’s a simple process that ensures your turkey turns out perfectly.
Step 1: Prepare and Clean Your Turkey
Start by getting your turkey ready for brining. Take out the giblets and neck, then rinse it under cold water. Dry the turkey with paper towels, inside and out, to remove moisture. This helps the brine soak into the meat evenly.
Step 2: Submerge the Turkey Completely in Brine
Put the turkey in a big container or brining bag that can hold it all in brine. Pour the cooled brine over the turkey, making sure it’s fully covered. If it’s not, use a plate or heavy object to keep it down.
Step 3: Refrigerate at Safe Temperatures
Put the turkey in the fridge at 38°F (3°C) or below. It’s important to keep the brine cold to stop bacteria from growing. The turkey should stay in the fridge for the right amount of time based on its size.
Step 4: Remove and Rinse Thoroughly
After brining, take the turkey out and rinse it under cold water to get rid of extra salt. This step stops the turkey from being too salty when it’s cooked.
Step 5: Dry and Rest Before Roasting
Pat the turkey dry with paper towels to help it brown better when roasted. Let it rest for 30 minutes to an hour before roasting. This lets the meat relax and the skin dry out more.
| Step | Description | Tips |
|---|---|---|
| 1 | Prepare and Clean Your Turkey | Remove giblets and neck, rinse, and pat dry. |
| 2 | Submerge the Turkey Completely in Brine | Use a large container or brining bag, weigh down if necessary. |
| 3 | Refrigerate at Safe Temperatures | Keep at 38°F (3°C) or below. |
| 4 | Remove and Rinse Thoroughly | Rinse under cold running water. |
| 5 | Dry and Rest Before Roasting | Pat dry and let rest for 30 minutes to an hour. |
Brining Time Guidelines for Perfect Results
To get the most out of your simple turkey brine, follow these size-based brining guidelines. The brining time is crucial for achieving a perfectly cooked, juicy turkey.
The size of your turkey plays a significant role in determining the ideal brining duration. Brining for the right amount of time ensures that the turkey absorbs the flavors and retains moisture.
Small Turkeys: 10 to 14 Pounds
For smaller turkeys weighing between 10 to 14 pounds, a brining time of 24 hours is typically sufficient. This duration allows the brine to penetrate the meat evenly without over-salting it.
Medium Turkeys: 15 to 18 Pounds
Turkeys in the 15 to 18-pound range require a slightly longer brining time, typically 36 to 48 hours. This extended period ensures that the larger bird is adequately flavored and moist.
Large Turkeys: 19 to 24 Pounds
For larger turkeys, those between 19 to 24 pounds, it’s recommended to brine for 48 to 72 hours. This longer brining time is necessary to ensure that the turkey is well-seasoned and retains its juiciness during cooking.
What Happens If You Brine Too Long
Brining your turkey for too long can lead to overly salty meat and an unpleasant texture. It’s essential to adhere to the recommended brining times based on the size of your turkey to avoid these issues.
Over-brining can also result in a turkey that’s too moist, potentially affecting its texture and overall appeal. Thus, monitoring the brining time is crucial for achieving the perfect balance of flavor and texture.
Creative Flavor Variations for Your Turkey Brine Solution
Make your turkey a masterpiece with creative brine flavors. You can mix many ingredients into your brine. Try citrus, herbs, spices, and sweet elements for a unique taste.
Citrus Herb Brine with Rosemary and Thyme
A citrus herb brine adds a fresh twist. It combines citrus peels with rosemary and thyme. This creates a brine that flavors the turkey and pairs well with sides.
To make it, add sliced oranges and lemons, and fresh rosemary and thyme to your basic brine.
Apple Cider Brine with Cinnamon and Cloves
An apple cider brine is great for fall. It mixes apple cider’s sweetness with cinnamon and cloves’ warmth. This creates a cozy yet sophisticated flavor.
To make it, use apple cider instead of water in your brine. Add cinnamon sticks and whole cloves.
Cajun Spiced Brine with Garlic and Paprika
For a bold flavor, try a Cajun spiced brine. It combines garlic’s pungency with paprika’s smoky heat. This makes a turkey full of depth.
To make it, add minced garlic, smoked paprika, and Cajun spices to your basic brine.
Maple Bourbon Brine with Brown Sugar
A maple bourbon brine with brown sugar is indulgent. Maple syrup and brown sugar’s sweetness balances with bourbon’s richness. This creates a complex flavor.
To make it, add maple syrup, bourbon, and brown sugar to your basic brine. Adjust the amounts to taste.
Expert Brining Turkey Tips for Success
To get a perfectly brined turkey, follow expert tips for a moist and flavorful bird. Brining is easy if you follow key guidelines. Here are some tips to brine your turkey to perfection.
Keep Your Brine Ice Cold Throughout the Process
Keeping the brine cold is crucial. Always keep your brine solution ice cold to stop bacteria from growing. Use ice packs or frozen gel packs in the brining container. As “Julia Child once said, ‘The only time to eat diet food is while you’re waiting for the steak to cook,'” but for brining, it’s about keeping it cold, not dieting.
Use a Brining Bag or Food-Grade Container
The container for brining is as important as the brine. Use a large, food-grade container or a brining bag that fits the turkey and brine. This makes sure the turkey is fully covered and the brine works evenly.
Never Brine Pre-Salted or Kosher Turkeys
Don’t brine pre-salted or kosher turkeys. They’ve already been salted, and more brining can make the bird too salty. Always check the turkey label to see if it’s pre-salted or kosher.
Always Pat the Turkey Completely Dry
After brining, pat the turkey dry with paper towels. This step removes excess moisture, which is key for a crispy skin. Don’t skip this, as it greatly affects the turkey’s texture.
Adjust Your Roasting Time According
A brined turkey might roast differently than an unbrined one. Watch your turkey while it’s roasting and adjust the cooking time as needed. A meat thermometer is your best friend here, ensuring the turkey is safe to eat.
Common Turkey Brining Mistakes to Avoid
Brining a turkey can make it taste amazing and stay moist. But, some mistakes can ruin it. Knowing these common errors helps you brine your turkey right.
Using Incorrect Salt-to-Water Ratios
Getting the salt-to-water ratio right is key. Too little salt won’t add flavor or keep moisture. Too much salt makes the turkey too salty. Use about 1 cup of kosher salt for every gallon of water.
Not Fully Dissolving the Brine Ingredients
Not dissolving the brine ingredients evenly can mess up flavor. Stir the brine well until everything is dissolved. This makes sure the brine works right.
Allowing the Turkey to Sit at Room Temperature
Letting the turkey sit at room temperature too long is bad. It can grow bacteria. Always keep it cold, at 40°F (4°C) or below.
Skipping the Rinse Step After Brining
After brining, rinse the turkey under cold water. This removes extra salt. It also helps it brown better when roasted.
Over-Brining Your Turkey
Brining for too long can make the turkey too salty or mushy. Stick to the recommended brining time for your turkey’s size.
To avoid common brining mistakes, remember:
- Use the right salt-to-water ratio
- Dissolve brine ingredients fully
- Keep the turkey cold
- Rinse the turkey after brining
- Brine for the right amount of time
Conclusion
You now know how to make a delicious turkey with a simple brine recipe. Brining keeps your turkey juicy and full of flavor. It makes your turkey the star of any meal.
Brining not only makes your turkey taste better but also cooks it perfectly. It involves soaking the turkey in a saltwater mix. This tenderizes the meat and boosts its flavor.
The secret to a great brine is in its ingredients and how you prepare them. Choosing the right salt and sugar, and adding spices, is key. Try different flavors to create your own unique turkey brine.
With these tips, you’re ready to wow your guests with a brined turkey. So, go ahead and give your turkey the flavor it deserves with a well-crafted brine recipe.